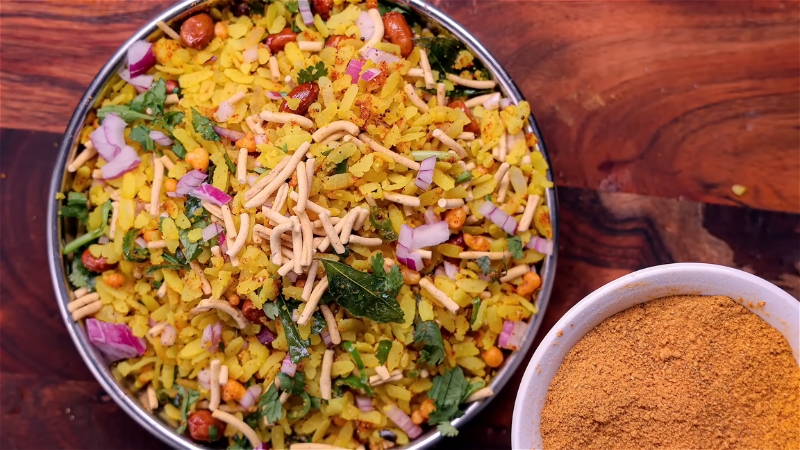
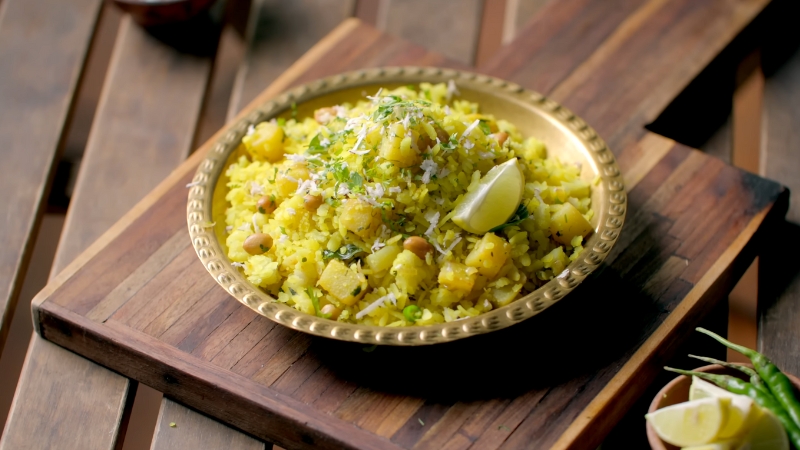
Spicy Masala Poha Recipe – How to make Flattened Rice
If you’re looking for a quick, healthy, and flavorful breakfast that never gets old, Spicy Masala Poha is the one to try. I grew up eating poha regularly, and to this day, it remains one of my all-time favorites. It’s light, satisfying, and comes together in minutes—perfect for busy mornings or even a quick-fix meal at any time of the day.
Poha, or flattened rice, originally comes from western India, but its simplicity and versatility have made it a staple across the country. Every home has its own version—some add just onions (like the famous Kanda Poha from Maharashtra), while others pack it with vegetables for extra texture and flavor.
For me, poha wasn’t just a dish—it was a lunchbox favorite during school days and a comforting breakfast at home. But after getting married and moving to Ahmedabad, I discovered that my new family had an entirely different approach.
Instead of breakfast, they preferred poha as a light dinner! It was a shift, but one I happily embraced—because honestly, poha works anytime.
Over the years, I’ve experimented with at least 10-12 different poha variations, playing around with vegetables and spice blends. While I love mix vegetable poha and even the popular potato poha, this masala version always wins hearts in my family.
If you love flavor-packed breakfasts (or dinners), give this Masala Poha a try. It’s simple, loaded with spices, and has the perfect balance of crunch and softness.

Spicy Masala Poha
Equipment
- Medium-sized nonstick pan or kadhai
- Strainer
- Mixing spoon
- Knife and chopping board
- Small bowl (for soaking poha)
- Lid for steaming
Ingredients
Main Ingredients
- 1 cup poha (flattened rice, medium or thick)
- ⅓ cup onion, finely chopped
- ⅓ cup tomato, finely chopped
- 2 green chilies, finely chopped (adjust to taste)
- 1 inch piece of ginger, grated
- 1 tsp cumin seeds
- 1 tbsp oil (groundnut or vegetable oil)
Spices & Seasonings
- ½ tsp turmeric powder
- 1 tsp red chili powder
- 1 tsp coriander powder
- salt, to taste
- 1 tsp sugar
- ½ tsp garam masala
- juice of 1 lime
For Garnishing
- 2 tbsp fresh coriander leaves, chopped
Instructions
- Prep the PohaPlace 1 cup poha in a bowl. Rinse once with water, then drain immediately.Add a little fresh water again, mix lightly, and drain using a strainer.Let poha rest in the strainer for 10 minutes until softened. Test a flake by pressing it—if it breaks easily, it’s ready.

- Cook the Masala BaseHeat 1 tbsp oil in a pan over medium heat.Add 1 tsp cumin seeds and let them splutter.Toss in chopped onions and tomatoes. Cook for 2–3 minutes until soft.Add green chilies and grated ginger. Stir for 30 seconds.Mix in turmeric, red chili, coriander powder, and salt. Cook for 30–40 seconds to bloom the spices.

- Add Poha and SteamGently mix in the softened poha.Add ½ cup water, stir, and cover. Let it steam for 2–3 minutes.Remove the lid, then stir in sugar, lime juice, and garam masala.Cook for another 2–3 minutes on low, mixing gently.

- Finish and ServeTurn off the heat. Garnish with fresh coriander.Serve hot with tea or yogurt. Add roasted peanuts or sev for crunch.

Video
Notes
Cooking Tips
- Use medium/thick poha: Thin poha gets soggy easily.
- Spice to taste: Adjust chilies and chili powder based on your heat tolerance.
- Fluff with care: Stir gently to avoid breaking the poha flakes.
- Customize: Add boiled potatoes, peas, or carrots for variety.
- Crunch it up: Roasted peanuts or crispy sev add amazing texture.
Common Mistakes to Avoid When Making Spicy Masala Poha
Bottom Line
I’ve made Spicy Masala Poha more times than I can count, and every time, it brings back memories of home, school lunches, and lazy weekend breakfasts. It’s quick, flavorful, and adaptable to whatever ingredients you have on hand.
The key is in the small details—getting the texture right, balancing the spices, and knowing when to stop cooking. Once you’ve nailed that, you’ll never look at poha the same way again.
On days when you’re craving something extra crispy, Crispy Besan Poori makes a perfect pairing with poha, adding a delightful crunch to the meal.
So, next time you’re craving something warm, comforting, and packed with flavor, skip the complicated meals and go for this simple yet satisfying dish. Try it out, make it your own, and most importantly—enjoy every bite!
Hello, my name is Marina Vlasov. Im currently trying to change my career from my current job to becoming a chef. It is a hard road, but I feel like im coming there soon. While I enjoy preparing practically all food, from various cuisines from all over the globe, I must say that I mostly enjoy preparing vegan food. That is my strongest side. That is why I want to provide you with the best vegan food recipes on this blog of mine.

